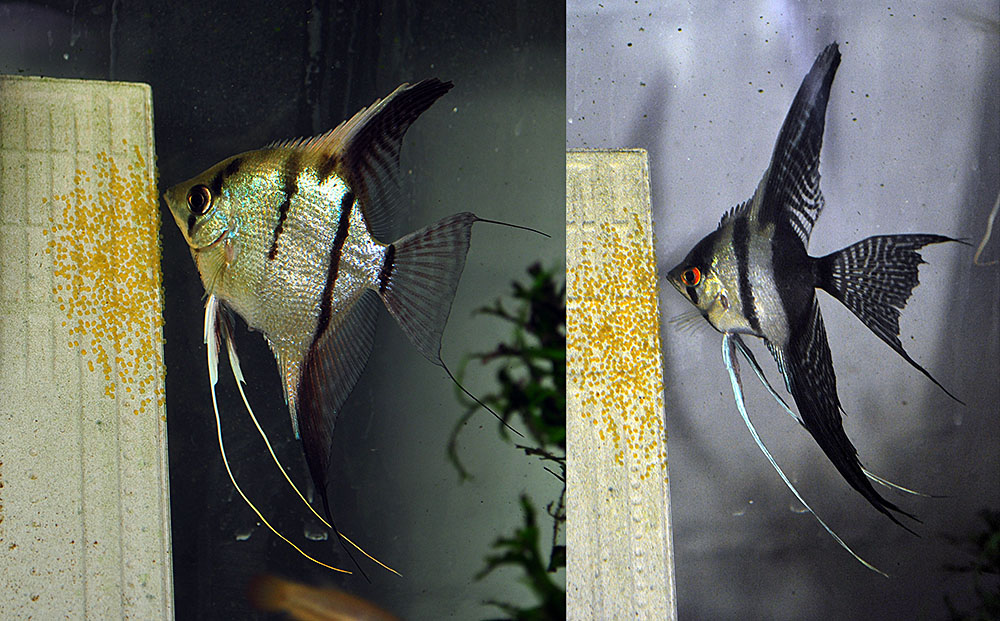
Female (left) 50% wild Silver, and Male (right) Haflblack Silver Veil Angelfish tending one of their first nests, this one 6/19/2013
Whether or not to incubate the eggs of your fish artificially has been a long running debate—certainly as long as I’ve been breeding fish and no doubt long before I ever started.
Mathias Eberhardt spoke of the downsides to artificial incubation our interview with Eberhardt in the current (November/December 2013) issue of AMAZONAS Magazine, suggesting that “artificially reared fish are subsequently difficult to breed,” in his case referring to problems with female Tropheus spp. often eating their eggs before learning to carry fry to term. “Naturally reared fish do not have this problem and carry out broodcare reliably from the beginning,” Eberhardt believes.aa
Still, there are times when natural brood care fails (whether parents are egg / fry eaters or other inhabitants are to blame), and there are times (which Eberhardt eluded to) where emphasis is on maximizing production (whether for commercial or conservation motives). In the case of the Angelfish pair shown above, I had an additional reason to pursue artificial incubation—to not only maximize production, but to determine whether this new pair was fertile.
Given my design of broodstock tanks for Angelfish production, allowing natural “parent-raising” has always meant that babies are goners once they are free swimming, so ultimately I have relied on artificial incubation for the production of my fish. I did a lot of researching and reading on the internet before ultimately coming up with a methodology that is so consistent that I can reasonably assume that if the eggs foul, it was a problem with the eggs, not the incubation. Here’s how I do it. Part 1 – Spawning Substrates For starters, I give all my angelfish pairs removable substrates to spawn on. Many breeders seem to like gray slate tiles; I’m doing fine with white ceramic tiles, presenting the rough side to the fish for spawning (I have had a pair go behind the tile and spawn on the smooth side..it still worked, to my surprise).
The reason to use the tile or slate is that you can remove it very quickly once you discover a spawn; this reduces in-tank contamination and short circuits egg eating. Most breeders seem to suggest pulling the eggs simply as soon as you can, citing diminishing success rates the longer you leave them with the parents. I cannot say I’ve observed this level of time sensitivity.
When you pull the nest from the parents, you can instantly replace the tile with another one. They still seem puzzled by the sudden disappearance of the eggs, but I think leaving them without the tile for several days might cause problems with them using it for subsequent spawns. If you can’t get your angelfish to spawn where you want them to, no worries. I’ve developed a protocol for dealing with that which is simple and effective; I’ll cover that in my next installment.
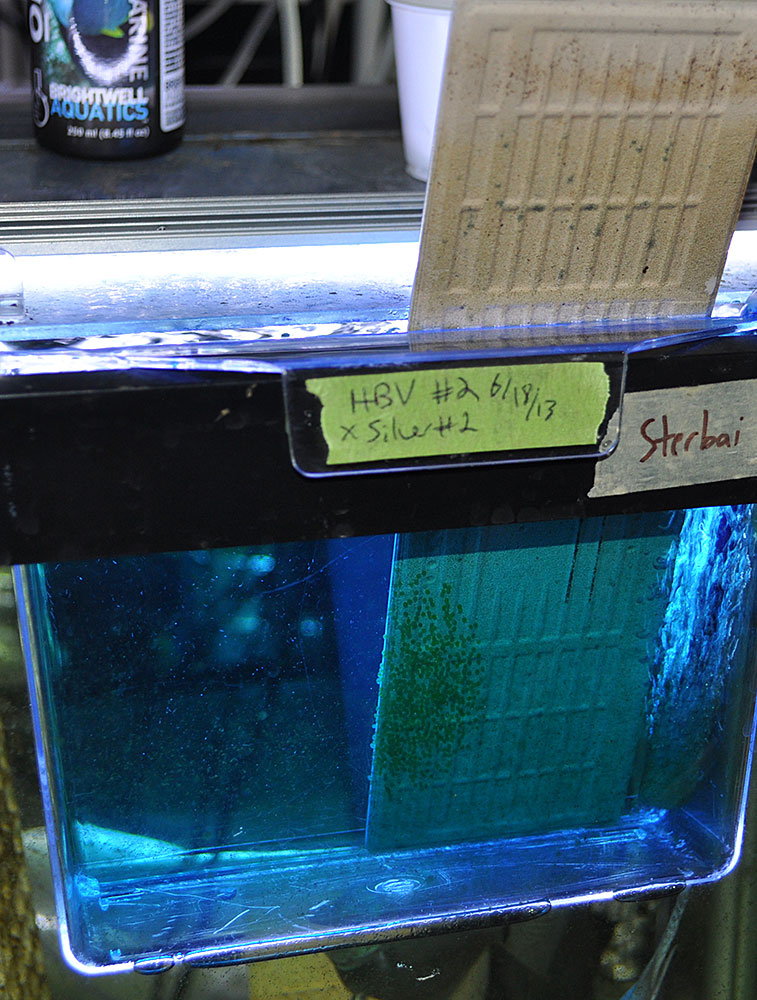
Part 2 – Incubation Vessels I have settled on a large (half-gallon) specimen cup as an easily obtainable and reasonably reliable vessel for incubation of the eggs on the tile. It is large enough that no matter where the eggs are laid on the tile, I can keep them all submerged, even if I have to get a little creative with the orientation of the tile in the container. The main reason I like the specimen cup is that I can hang it in the broodstock tank, which then functions as a water bath and keeps the temperature constant for the eggs.
I prep the specimen cups often by giving them a quick wipe down with hydrogen peroxide followed by a good rinse in tap water. I should also mention that, along with the container, you need a good air-feed with an air stone for circulation.
Part 3 – RODI Water This part is critical in my opinion. Every time I have tried artificial incubations with my tapwater I have run into problems. While I maintain a highly productive RO/DI unit in my fishroom for my marine aquariums, you can easily purchase RO water at the grocery store one gallon at a time. Realistically, just one gallon per incubation is probably what you need.
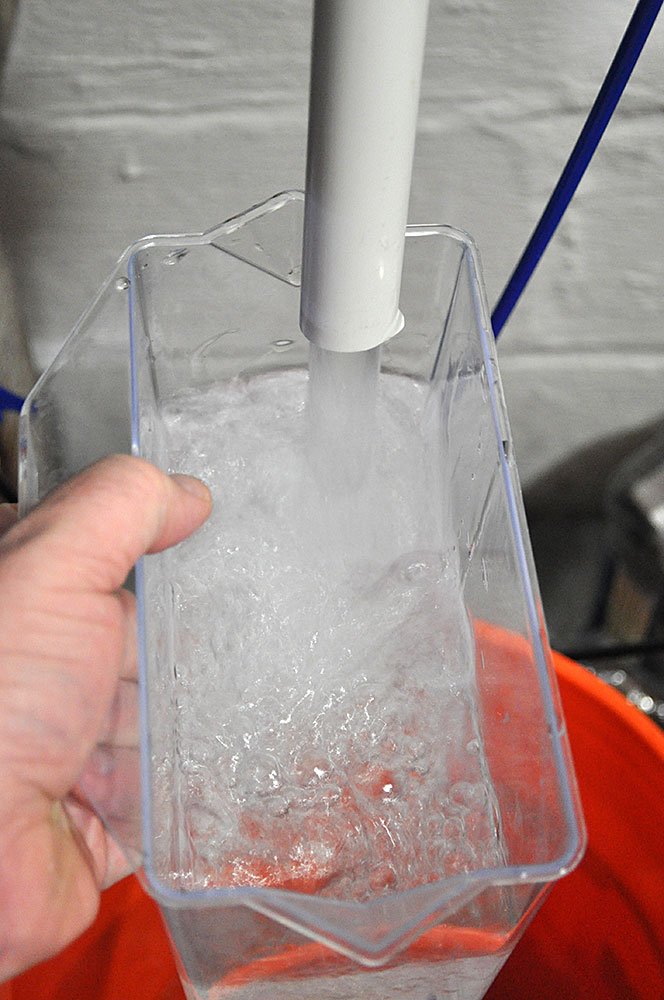
Filling the specimen cup with RODI water.
My RO/DI storage is heated, so I have no issues simply taking water and using it immediately. After cleaning my specimen cup, I fill it with RO/DI water and place it in any one of my broodstock aquariums for incubation.
Part 4 – Egg Transfer
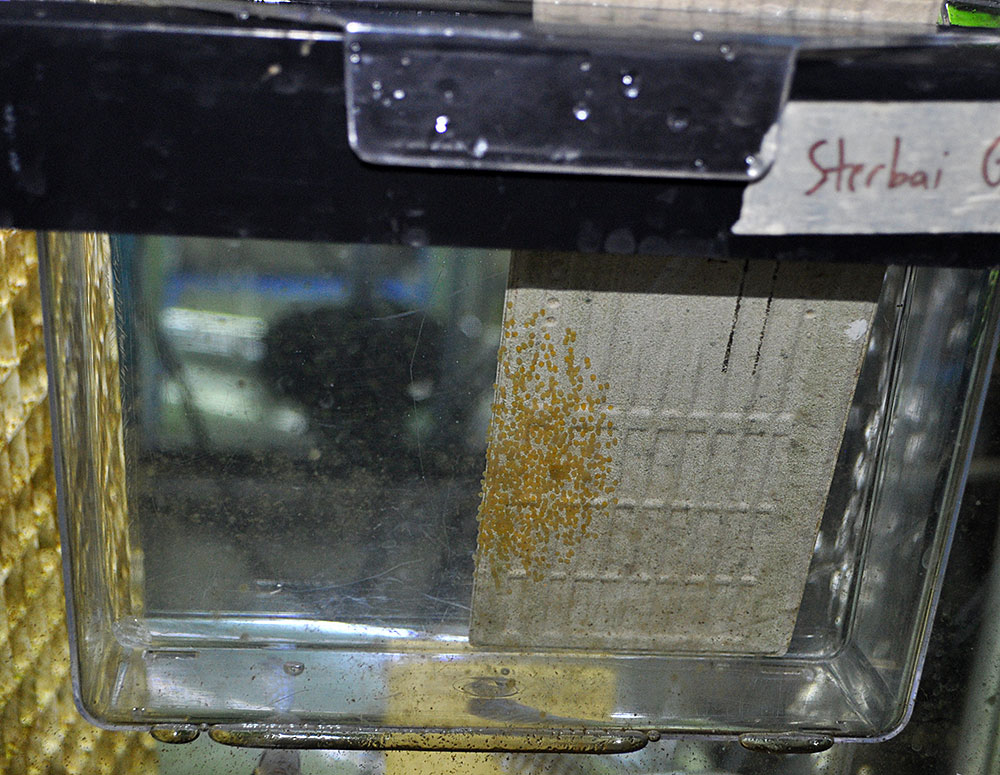
Moving the eggs couldn’t be simpler – just pick up the tile and put it into the prepared specimen cup.
This is beyond simple. Pick up the tile, and place it in the now-filled specimen cup. You do not need to worry about briefly exposing the eggs to air (case in point, this clutch was the clutch I used for my egg counting demostration). Once in the container, I adjust the air flow to be pretty brisk – not enough to blast the eggs off the tile, but simply enough to keep the water circulating well.
Part 5 – Methylene Blue
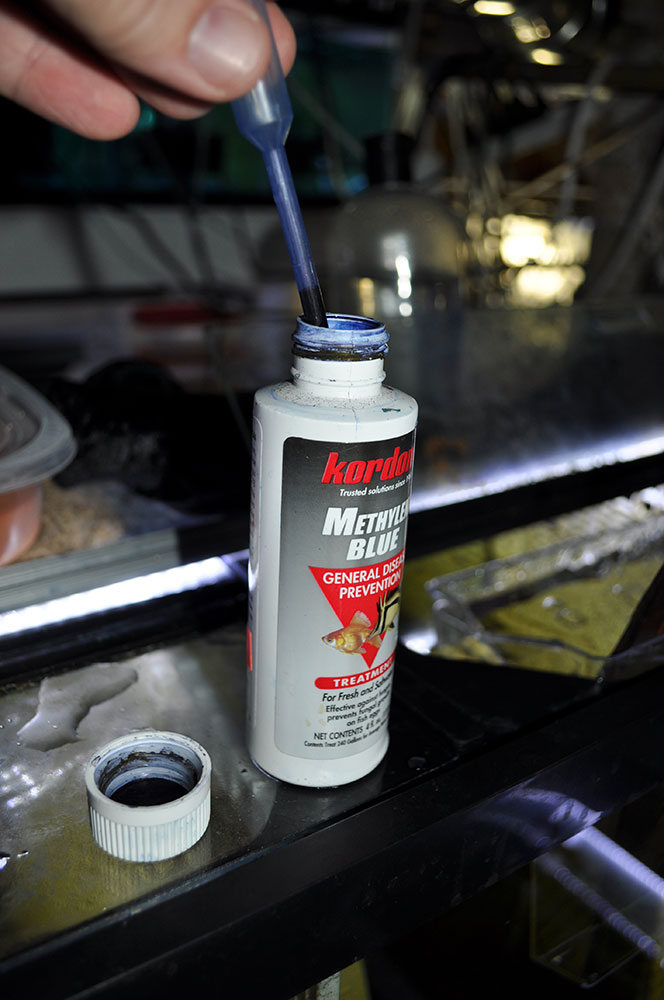
Dosing methylene blue is said to perform a number of beneficial functions in artificial incubation.
Many different anti-fungal / anti-bacterial additives have been proposed for the artificial rearing of angelfish, including Acryflavin, Hydrogen Peroxide, and Methylene Blue. I like Methylene Blue because I’ve had zero problems with it, it is easily accessible, and it seems to “do the trick”. Once the eggs are set up in the incubator, I dose methylene blue at a rate of 10 drops per gallon (so the large specimen cup gets 5 drops; if I’m forced to use a small specimen cup which is roughly a quarter gallon, I use 2 drops). Part 6 – Label The Batch
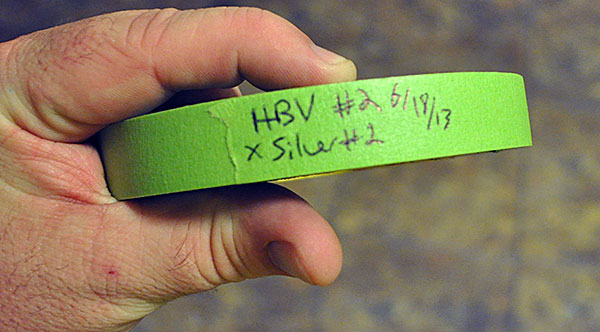
My fishroom is covered in masking tape and sticky notes.
I label the batch with parental information and spawn date. Simply writing on masking tape, and affixing it to the specimen cup’s hanger, does the trick. Part 7 – Now You Wait
Artificial Incubation is all set and ready to go!
Read on to Part 2 to see how it all turned out!


Really great write up! Thanks for sharing!!
Where would one normally find these INCUBATION VESSELS?
Why my Angel eggs are partly hatching and only getting a few fry is my ph to high 7.8 .
How can I get more fry to hatch .
Rickey
South Africa
Durban
Ricky, you’d need to provide more information about how you’re approaching this than simply the pH. How you’re caring for the parents can affect the quality of the eggs they produce. Other factors, such as temperature, water chemistry and quality, and whether you’re trying natural parental incubation or artificial incubation, all could be playing a role.
Thk you Matt for replying .
My ph is 7.8 temperature 28 and I breed them in pairs I cannot trust them because they eat y he eggs therefore I pull the eggs out and foster hatch using methlene blue .I use a 2 litre plastic bottle but hatch rate is poor .the fry are bloated and die off .I only raise about 50 to 60 fry at a time .most of the eggs looks like it hard to hatch .here in south africa no one can help me and pay no interest if you ask them for help .god bless from Rickey
Hi Rickey! Do you have access to RO/DI water? This is water that is effectively stripped clean of everything except water itself; the TDS (total dissolved solids) of my RO/DI usually reads 0, sometimes 1 or 2 ppm as the cartridges get old and need changing. I firmly believe that is part of my success with this method….if you’re using tank water or fresh water at that higher pH, and presumably hard, that could be the reason for your problems. Try RO/DI (you can sometimes buy “Reverse Osmosis” bottled water here in the US at a grocery store, perhaps you can find it there as well….again, RO, NOT distilled). You also need to water bathe it so that the temperature is maintained and stable. That’s another critical part of the method shown here.
I cannot speak to the discus problems as I haven’t bred discus myself (but it looks like I have a pair forming!!!) I can speak from more general experience, both on the FW and saltwater side, to offer these ideas. First, fish often eat eggs if they are infertile or diseased. Water quality in terms of organic pollution / bacterial levels could be a culprit. Next, fish sometimes eat eggs if there is something deficient in their diet; of course what you listed seems, to me, to be a pretty well rounded and diverse diet, so not necessarily a cause here. Still, one of the tricks that clownfish breeders use to prevent egg eating (and to improve egg quality) is to feed EGGS to the clownfish broodstock. I’ve never done it with Freshwater Fish, but I don’t see why it would hurt to try! I don’t know what you have available to you there, but here, in the past there have been Lobster or Prawn eggs, and capalin roe (Sushi Masago) is a staple offering that several frozen food manufacturers offer.
As far as eating FRY, that’s another story altogether. Again, I’ve not worked with discus, so I can only speak from a more generalized standpoint, but at some point in the wild fry leave their parents. If the parents are getting ready to spawn again, they may turn on the fry, and if they are trying to drive them off but there is no place for them to go, they could wind up getting eaten. Fear is another possible cause of fry eating; if the breeders are nervous or uncomfortable they could eat their offspring. I might try blocking out the sides, and maybe even the front of the tank, to make them feel more secure. But basically, as soon as the fry are feeding on their own, remove them, and hopefully you’ll get more and you won’t lose them to their own parents!
Good luck, please feel free to follow up with any other questions!
Thank you sir
I tried your mothod with ro/di and had a good hatch rate and have plenty of angel fry .god bles you for saving so many lives that I have lost in the past .
I had six spawning over 300 fry now I can make some good money in south africa .
Here no one gives info they keep to them selve and fade away .
Americans share thier knowledge not out people here in Africa .
From Rickey
I also have two pair of discus with a three part filteration and use pray,Indian almond ,and gift wood and temperature 30 but they eat the eggs and the fry all the time .I have tried several times but no luck .No one wants to share thier secerets on breeding discus .how these breeders in overseas breed them by the hundreds and I cannot get to have 50 fry .I feed them well beefeart ,bloodworms ,terra bits and flakes .what is so secrets of this fish .can you help me .I am brreding from 5 year old boy today I am 52 and love this has a hobby .god bless from Rickey south Africa.
Hi sir
I breed pearl gouramis and there is no liquid fry here .
Brine shrimp is to big .have plenty of fry end up with few .
Cover the top of tank but most fry die on me .
What format can you advice me in future .
God bless
Rickey
For pearl gouramis, some sources suggest powdered fry foods (which are available) and of course, there is also microworms. I might suggest Vinegar Eels, although I’ve not tried them myself, but they seem like they’d be a godo choice.
Hi sir
Why I am loosing so many fry .
When must I take them out from the spawn jar.
From rickey
South Africa
When I rear angelfish, I remove them from the hatching vessel the moment they are free swimming, at which point they get baby brine shrimp as a first food.
Hi sir
From the jar what method must i use to drop the fry in the rearing tank so I do not shock them .
What water must i use in the rearing tank which the fry will be kept.
Advice me why can I buy brine shrimp my supply stopped now .
From rickey
South Africa
Durban
Ricky, since I incubate the angel eggs in pure RO/DI water, that is what I initially put in the 10 gallon rearing tank, so it’s the same water chemistry and an easy transition. You can read more about it in Part II of this article – http://www.reef2rainforest.com/2013/10/15/friday-photospread-artificial-incubation-of-freshwater-angelfish-eggs-part-2/
As far as where to get brine shrimp eggs, I’m not sure. I don’t know what import restrictions, if any, apply to you in South Africa on brine shrimp eggs. I would guess they’re easy to get…if there’s a local shop or a local aquarium club, try asking locally and see where you can go.
Hi sir
I have a pair of black angels and they are not eating .
Went on a hunger strike .good breeders for me .
What can you advice me .
Thk you for advice on my fry .they are doing well and i am produceing more than enough to mske some good money here in RSA.
God bless you for the info you give me .
No one can help in my country
They only think sbout making money and not sharing knowledge to others.
God bless
Rickey naidoo
Rickey, first, sometimes angels will stop eating while breeding. However, if they are taking in food but spitting it out, try raising the temperature in their tank to 90F. You might also try offering frozen or freeze dried bloodworms to get them back on track. This can often be a sign of hexamita, in which case treatment with metronidazole is also indicated.
Thk you sir .
Do you breed pearl gouramis ?
If so need help .i have huge spawnings but end up with a few .i take out parents aftet spawning .feed infosoria after few days .
Give me your method like angels i am doing well and mass producing .thk God sent you to me .you are blessed .
Thk for responding so quickly .
I am far away from you but still connected thro cell phone .thk God .
Bless you
Fr Rickey
South Africa
I have not bred pearl gouramis, but I wonder if something like vinegar eels or freshwater rotifers could help with the first week or two until you can get them to eat baby brine shrimp.
Hi sir
Does ph matters in breeding angels .
My ph is 7.5 here
Is this fine or must i drop to 6.5 to make the eggs more fertile so the sperm of male can pennrate thro
The egg.
My water is soft here.
Fr rickey
I know people who’ve bred Angels in high pH and low. I breed in very soft water, but out of our tap our pH is artificially high. I don’t think a lower pH would hurt, but not sure if it would make any improvement if you’re already doing well. I’m only basing this on my experiences…there may be some better data / evidence out there.
Hi sir
I got 2 pairs of discus fish breeding but eating fry and eggs .
Not even made any money with them .
They are costing me money .
What you suggest must i do .
Regards
Rickey
Sorry Rickey, I can’t be much help here as I’ve never bred Discus.
Thk you for your help .you helped me so much that i have to tell you how much i appreite you .God must bless you because you have been a blessing to me .
I have a sick child that has a tumor in her eyes and my midical bills are increasing high and cannot make it.i am curruntly working but i need more money to live .so i breed fish and i supply to the local pet shops here to earn a little more income so i can sort my sick child with medication .Goverment here helps us but there is too many sick people here and are in the lower income bracket .
God must help everyone on this earth .
He sends people like you to help us .
I must thank God that i got a link with you and you replied to me .That is why i am telling you this .
If you did not reply to me i would not know the secrets of breeding angels .
I have so many fry that i cannot even count them .
The demand is here and i am moving forward and making some good profit which is helping me and my family .
God bless you
Rickey Naidoo
South Africa .
hello. I hope you see this message since you have not written here for 7 years. i am beggining to breed angelfish. i wonder what happens with the parents after spawning. Should i put them together again? but they will spawn again in 10 days or so… and i would like them to rest a month or more before spawning again. should i separate them? i do not know if it will make them happy, will stress them… thanks
Hi Gustavo, Matt Pedersen responding. I normally left my pairs together after removing the eggs, and simply fed heavily and allowed them to spawn whenever they were ready. You would have to physically separate them and bring them back together if you wanted to prevent spawning/give a rest period. Breaking a pair bond is not something I personally would’ve encouraged…I had no problems leaving the pairs together.