In the first installment, I showed you how I set up artificial incubation for my Angelfish spawns. In this second installment, you’ll see how it can turn out.
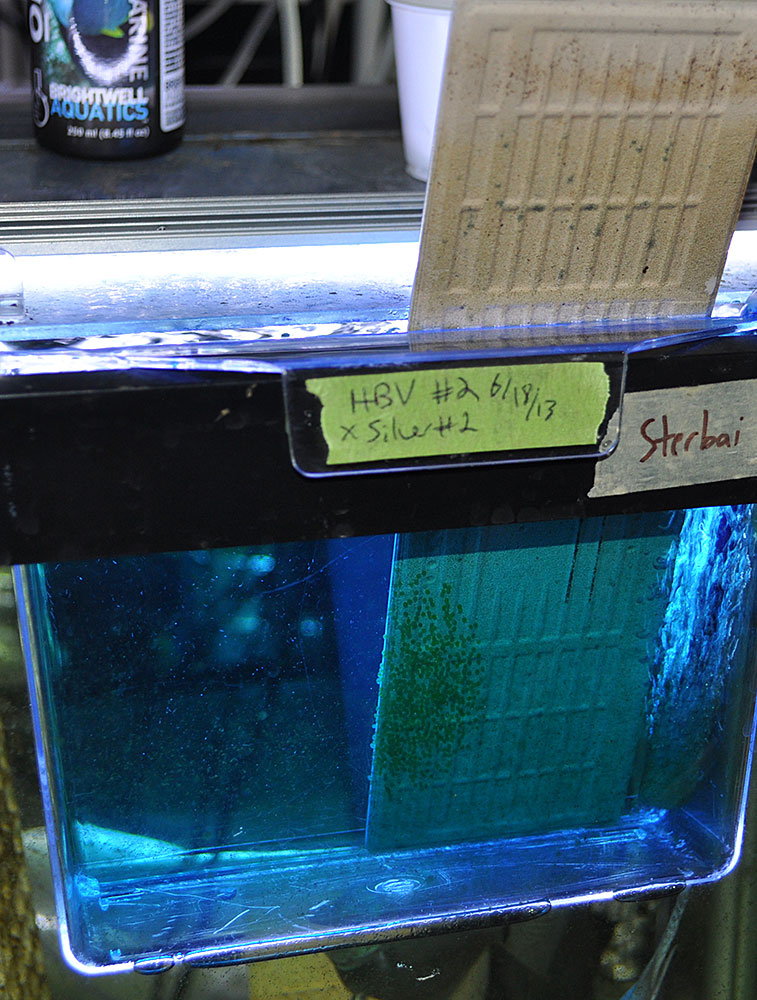
Artificial Incubation is all set and ready to go! – This shot on 6/19/2013
24 hours in
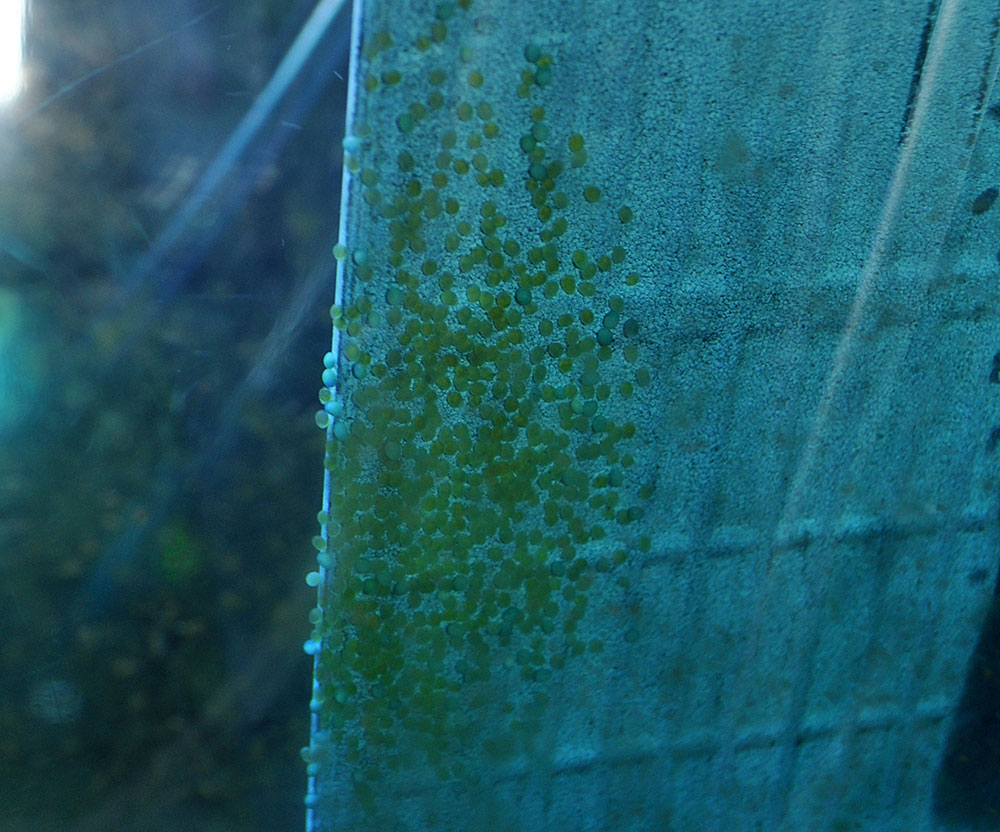
Angelfish Eggs 24 hours into artificial incubation.
In the first 24 hours, you should be able to readily identify infertile eggs. If the entire group is dead by this point, I’m generally convinced that something is wrong with the pair that has resulted in infertile eggs. As it happens, I’ve typically discovered the cause to be that the “pair” is in fact, not a “pair”, but two females (this has happened in at least 3 pairings this year alone).
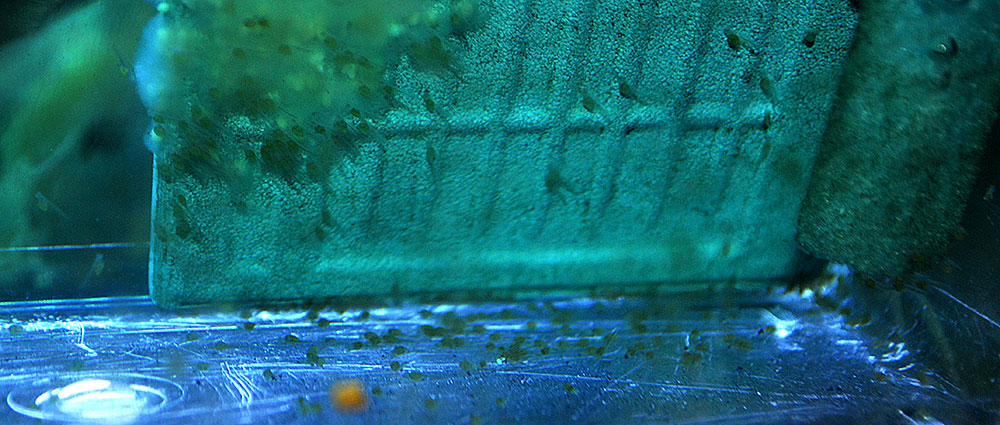
48 hours in
There won’t be much change between 24 and 48 hours, although you may see some fungal or bacterial growth on the dead eggs. Early on I laboriously tried to remove them with a pipette, but later on I found this typically wasn’t necessary and that problems didn’t seem to spread to viable eggs.
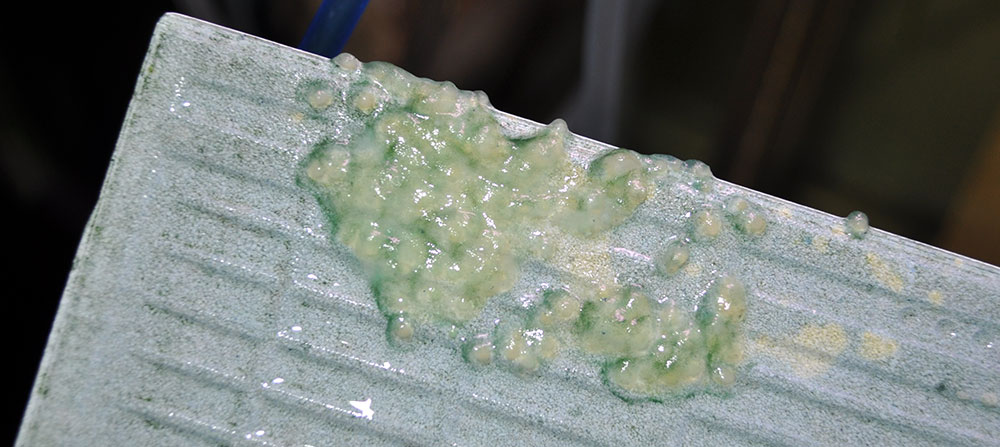
72 hours in
Hatch – we have wigglers (or is it wrigglers?)! This shot 6-22-2013.
By 72 hours in, you’ll have a hatch; your first indication that the pair is truly viable. Wigglers take a few days to develop, and now is not yet the time to remove the tile even if it is rather gunky.
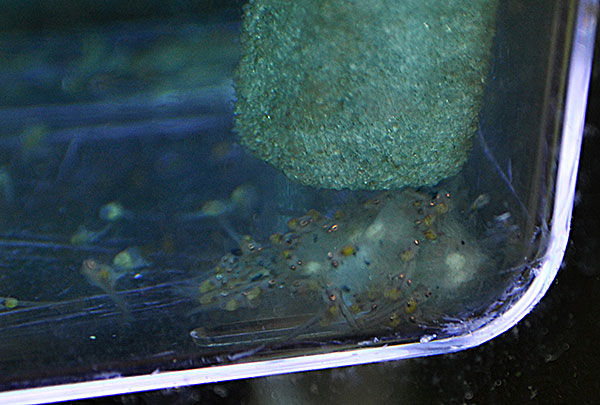
96 hours in
4 days into artificial incubation, 6/23/2013, fry are near free swimming, and fouled eggs are a congealed mess!
Another day and the larval anglefish tend to be off the tile for the most part. Their eyes are developing pigment and the juveniles are still feeding off their yolk sacks. If most of the fry are off the tile, I’ll try to remove it at this time, gently blowing any straggers off the tile with a pipette. In the case of our Haflblack X Silver pairing, this is what was left behind:
The remains of the eggs that didn’t make it!
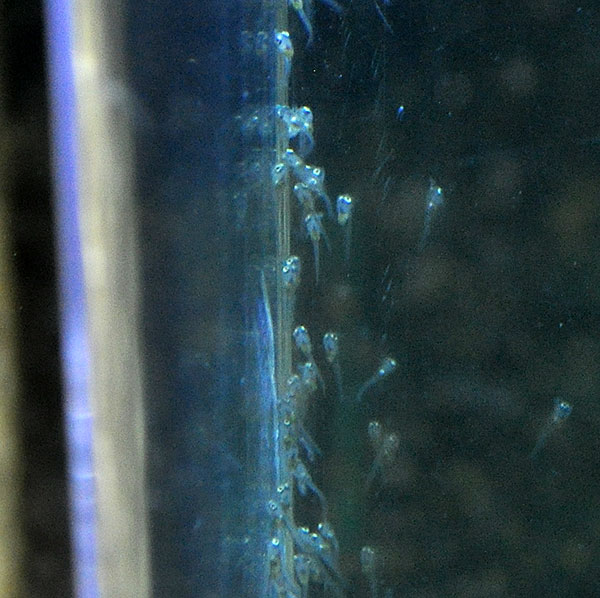
120 hours (5 days) post spawn
Baby angelfish, five days post spawn (shot 6-24-2013)
By this point there may be a few random decaying eggs that you can remove with a pipette if the fry aren’t attached to them. I have yet to have a failure with artificial incubation if I have hatched out offspring. As you can see, they are “close” but not ready, still driving development via their yolk reserves.
144 hours after the spawn
At 6 days pot spawn, the fry are nearing the free swimming and first feeding stage. Shot 10/25/2013
With warm water temperatures, the fry develop fast, and at 6 days in they are nearing free swimming and first feedings (I start them off with brine shrimp nauplii).
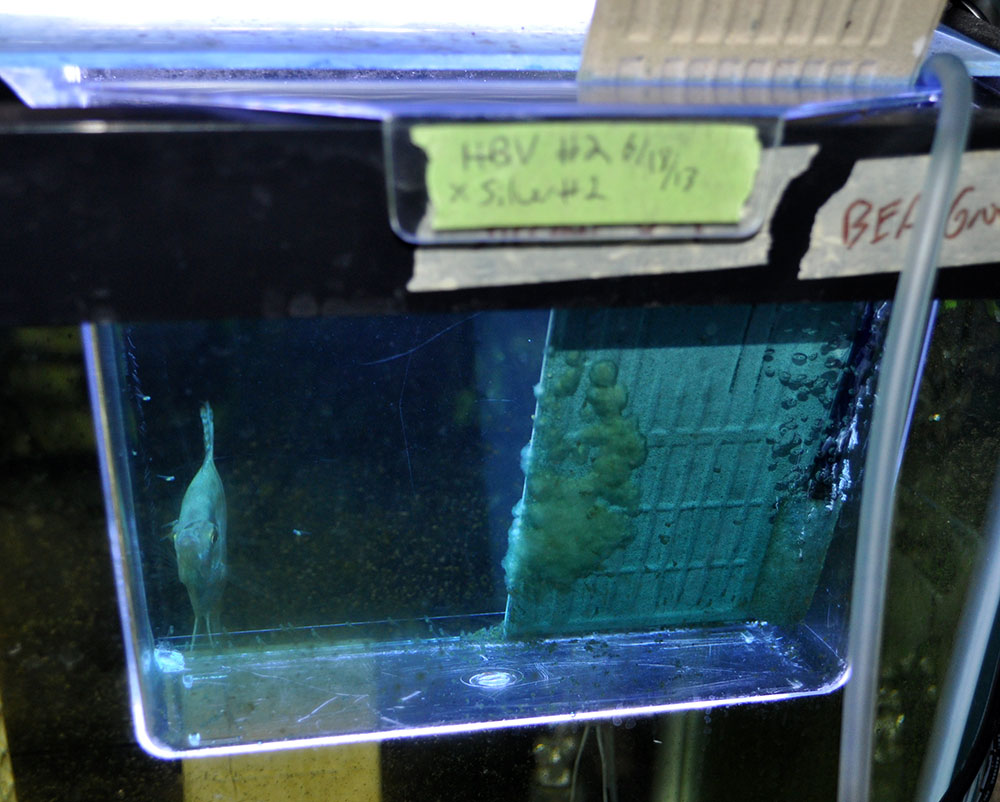
168 hours, 7 days post spawn
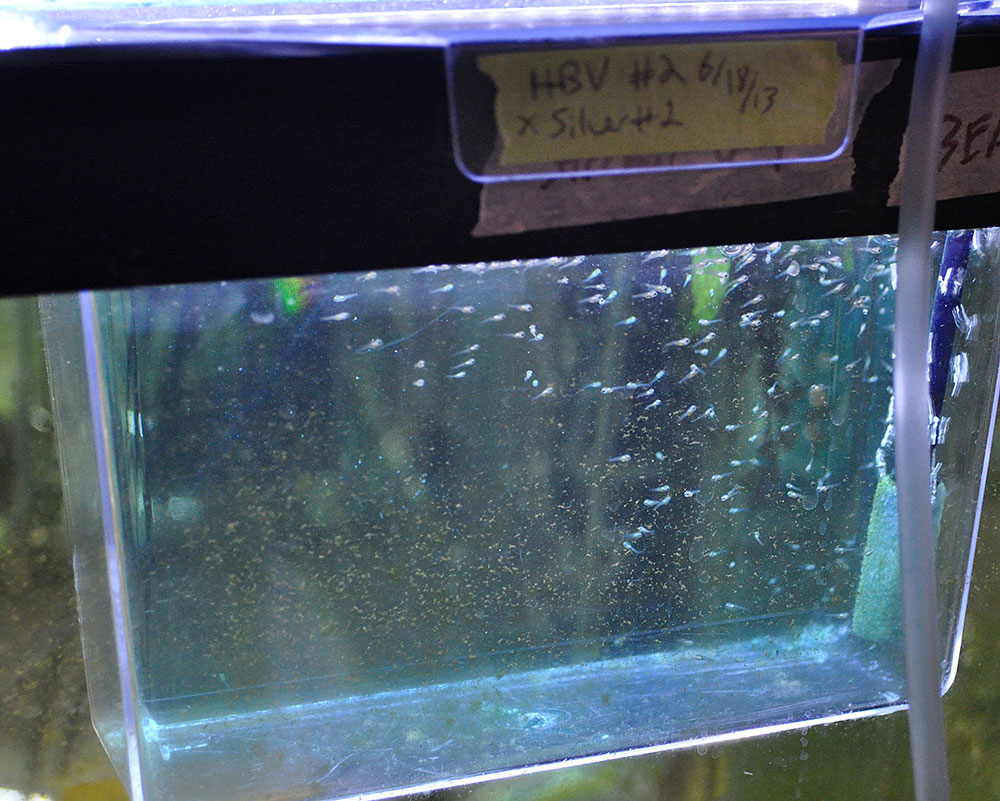
Shot 6-26-2013, the Halfblack X Silver fry are now free swimming and ready for grow out!
From here, it’s pretty easy to figure out where to go. Some breeders may not feed initially when the fry free swim, but I go ahead and give them their first baby brine shrimp. Not much gets eaten, but for those that do feed, all the better.
Typically from here I’ll transfer the fry to a 10 gallon tank that I’ve initially filled with RO/DI water; this eases the transition into the tank. Simply float the specimen cup in the tank to equalize temperatures, do a couple pours and fills to mix the water in the cup with tank water, and then dump them in.
After that, it is simply the grind of feeding and maintenance. I start doing water changes with tap water instead of RO/DI to bring them onto my regular water (no doubt mineral content helps with their growth too, as pointed out to me first by Frank of Indianwood Angelfish).

Halfblack X Silver Angel offspring at 6 weeks post spawn.
Wrapping it up
I have found this method to be pretty foolproof in the last year. I have tried it with other eggs, eg. Corydoras sterbae and Scleromystax barbatus, without similar success. I cannot say why that is, but apparently this methodology may, or may not work, with other fish species. I have found a certain level of security, however, in having this trustworthy protocol with my freshwater Angelfish.
Offspring from another Halfblack X Silver pairing at “nickel” size – the result of artificial rearing.
Sure, I still let parents tend nests when I don’t need them for rearing, but being able to have confidence in this method allows me to use it with first time spawners to quickly ascertain more about them. For example, I recently discovered two new pairings in my fishroom that throw albino offspring; both a surprise since none of the parents are albinos, and I wouldn’t have known this had I left the eggs with the parents.

I used your method this week. It worked very well – I have couple of hundred wigglers. I think the use of RODI water made bacterial counts minimal. I don’t know why I didn’t think of it earlier – I have used this method extensively with killifishes. Species like blue gularis which cause trouble for some using other methods yield nearly 100% hatch rate in RODI water with a few drops of methylene blue. At 76 F the eggs hatch in coordinated fashion in 14 – 16 days. To assure complete hatch when the first fry appear I exhale a few times into the water through a straw to increase CO2 (that is the lore) and all hatch within 60 minutes.
At what point do you pull them from the Methylene Blue?
During incubation through the free swimming stage, I would keep them in Methylene Blue. Once they are moved to a grow out tank, that is rapidly diluted.
What is RODI water? Is it distilled water that you buy in all the stores?
RODI is reverse osmosis deionized water, some pet stores will have it if you can’t find it at the super market.
Hi
I just want to thank you for this post. I followed your method but not RODI water. I was just using Prime for my water and put the angelfish eggs in with methylene. Im on day 3 post spawns now and the wigglers are still there. Not a lot for the first batch as the egss were eaten by the parents before I got a chance to setup the environment as explained in your post. Ill wait and see if they survive when transferring them to a 10 g.
Thank you once again.
I’ve been looking online for some time now as to when I should move my angelfish fry from my fluval breeding box to a grow out tank. I’ve been raising my fry artificially because my clown angel pair will eat the eggs (they’re in a 55 gallon community tank). I’ve started by putting them in a large jar with an airstone and methalyn blue and then once they are about to be free swimming I move them to my breeder box and they’re now 2.5 weeks old and I’ve been wondering if I should move them to my 20 gallon grow out tank or if that’ll still be too big for them at this point but I don’t have a smaller 10 gallon tank as I already have 3 tanks, 2 of which are community tanks. The breeder box does seem like it’s getting cramped for the 30 or so that are in there. . Any suggestion of when I should move them?
Hi Bailey, there’s an easier solution to all of this, particularly if you’re using one of the lower/more squat sponge filters. If this was my situation, I’d just stick the fry straight into the 20-gallon growout, and just run it at a lower water level initially if you felt you needed to do that to concentrate the feeds. If you’re using a lower sponge filter, you could cut a second, lower riser tube (or even just start off the run without one, adding it when you bring up the water level) Long term though, a 20-gallon isn’t going to be nearly enough space if you get really proficient at producing larger batches of offspring from this pair; you may need to think about another 55…and starting to line up a reliable way to sell off what you produce. I cannot stress it enough, frequent water changes to maintain high water quality are essential to producing quality angelfish! Congrats on your success so far, and best of luck going forward.
Hi Matt! I hope you are still answering questions about this article more than 10 years later. I am so happy I came across it! My husband and I were doing fine with hatching angelfish eggs ourselves until covid, and then something seemed to be different about our water. After that, we have had very little success. All along I have felt that the water was the issue, and it makes perfect sense that RO water can help. We have our first spawn in RO water going this week. My question is this (and I apologize if you have already answered it)… when we move the free swimmers to a 10g tank filled with RO water in about a week, does there also need to be a seeded filter in the tank? After moving them into the 10g, I understand what you said about making small water changes to acclimate the fry to our regular conditioned water. I just need more clarification about the filter. Thank you so much for your help! I can’t tell you how difficult it has been to find this kind of information, and you are so kind to share your knowledge.
Matt here. The short answer is yes, all the tanks I reared with would have had seeded filters because they were in more or less continuous use. The last thing you want is ammonia spiking up early in grow out, which can cause all manner of physical deformities or worse. The same is true for nitrite toxicity in young fish as well. Good clean water, keeping these environmental toxins at nondetectable levels, is one of the big keys to raising quality fish.
Matt, thank you so much for your quick response! We have wrigglers this morning so it won’t be long till we move them. I’m so excited! One quick followup question… We added methylene blue to the hatching jar 4 days ago when we pulled the eggs. Will we need to do RO water changes in the jar to remove the methylene blue before we pour the free swimmers into the 10g tank or will it dissipate by then? I didn’t know if any remaining MB would destroy the effectiveness of the seeded filter.
Matt, I read your article again about hanging the specimen cup in the 10g tank to equalize the temps and then do a couple of pours and dumps before adding the swimmers to the tank. Our wigglers are currently in a 1/2 gallon jar, but when they start to free swim, we will dump part of the water out of the jar so we can put them in the specimen cup and hang in the tank. From there, we will follow the rest of your instructions. Thanks again for your help!
Matt,
I am so happy to report that we now have 3 successful Koi Angelfish spawns going! Thank you so much for writing this article and sharing your knowledge!