Creating Nature, the new AMAZONAS Magazine series by Steve Waldron, continues in the July/August 2017 issue with Part 2 – Implementation.
Subscribe to AMAZONAS – Never Miss an Issue
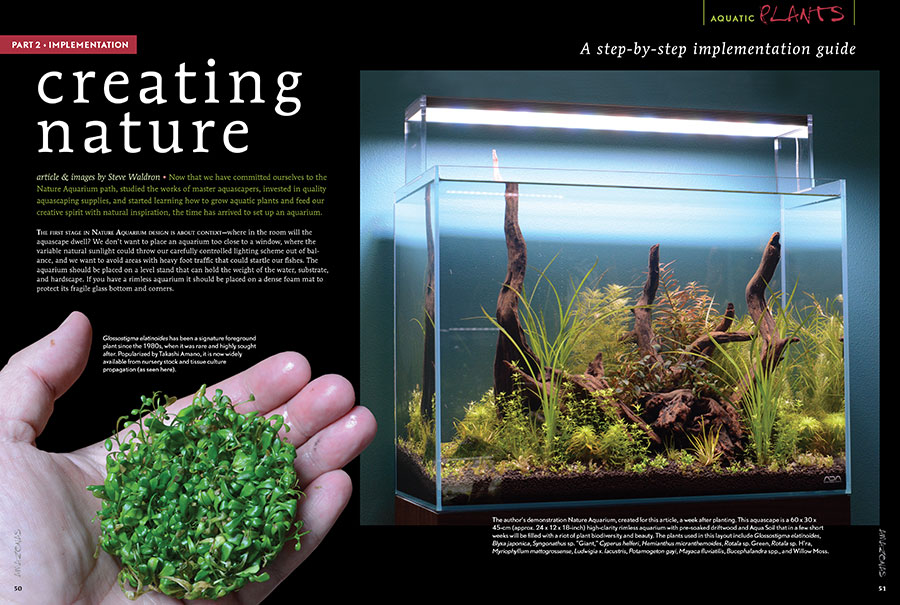
A step-by-step implementation guide
Article & images by Steve Waldron • Now that we have committed ourselves to the Nature Aquarium path, studied the works of master aquascapers, invested in quality aquascaping supplies, and started learning how to grow aquatic plants and feed our creative spirit with natural inspiration, the time has arrived to set up an aquarium.
The author’s demonstration Nature Aquarium, created for this article, a week after planting. This aquascape is a 60 x 30 x 45-cm (approx. 24 x 12 x 18-inch) high-clarity rimless aquarium with pre-soaked driftwood and Aqua Soil that in a few short weeks will be filled with a riot of plant biodiversity and beauty. The plants used in this layout include Glossostigma elatinoides, Blyxa japonica, Syngonathus sp. “Giant,” Cyperus helferi, Hemianthus micranthemoides, Rotala sp. Green, Rotala sp. H’ra, Myriophyllum mattogrossense, Ludwigia x. lacustris, Potamogeton gayi, Mayaca fluviatilis, Bucephalandra spp., and Willow Moss.
The first stage in Nature Aquarium design is about context—where in the room will the aquascape dwell? We don’t want to place an aquarium too close to a window, where the variable natural sunlight could throw our carefully controlled lighting scheme out of balance, and we want to avoid areas with heavy foot traffic that could startle our fishes. The aquarium should be placed on a level stand that can hold the weight of the water, substrate, and hardscape. If you have a rimless aquarium, it should be placed on a dense foam mat to protect its fragile glass bottom and corners.
There is also the aesthetic significance of context—how will this Nature Aquarium beautify your home? A well-executed planted aquarium is a living art piece and should be the centerpiece of the room. Going slowly and spending time with an empty aquarium, reflecting on its potential impact in a room, is an important exercise. In my opinion, one of the true masters of context is Adam Paszczela, a virtuoso aquascaper from Poland. Adam has created a beautiful aquascaping studio with rustic beams, wood floors, natural light, and just a lot of elegant style that shows off his magnificent Nature Aquariums to their best advantage. I want to live in his studio! (See Online, below.)
Laying down the substrate
Once the aquarium has been set up in its final position, the first installation step is adding the substrate. If your goal is to grow a dense garden of aquarium plants with wall-to-wall coverage, then a nutrient-rich, soil-based substrate will make your job much easier. I prefer to use ADA’s Amazonia Aqua Soil, and have had great repeated success with it, though I am sure other alternatives are fine too. I tend not to use any soil additives, as I usually break down an aquascape after a year or so and like to start out with fresh, fertile soil.
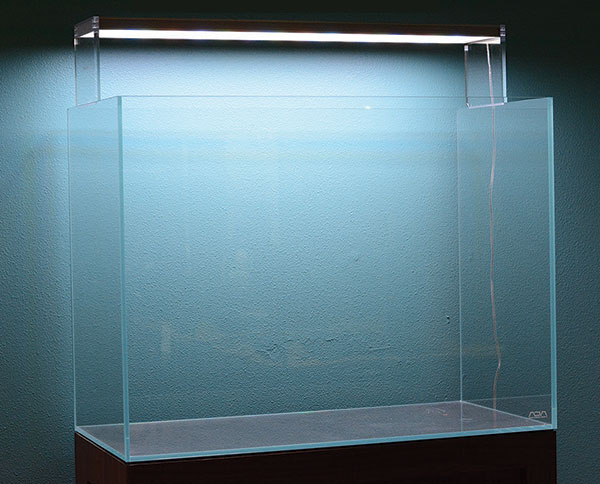
An empty aquarium is a vessel with endless creative potential.
For the aquascape shown in this article’s photos, I used one 2.4-gallon (9-L) bag of soil for the 12 x 24-inch (30 x 60-cm) footprint. Generally, you will need at least 2 inches (5 cm) of soil for stem plants and other plants with robust root systems, and at least 0.75 inch (1.9 cm) for carpeting plants. You can shape your soil layer any way you like—the sky is the limit. Some aquascapers create steep, high-banked substrates with precipitous slopes and inclines; some prefer zones of thick plantings over soil, broken up by patches of bright cosmetic sand. For this demonstration I chose a classic, gentle slope of shallow soil in the front, angling up to a higher bank at the back; this offers a nice perspective of the aquascape when viewed from the front and provides a base for my carpet of low-growing Glossostigma. If you are new to aquascaping, I recommend keeping it simple, with one substrate type and a basic substrate layout, as you will likely change up your plant arrangements many times before arriving at your final destination.
Hardscape choices
One of the most common questions I field at my shop is: “Why are these sticks and rocks so expensive? Can I just find something out in the woods or on the beach and put it in my aquarium?” Not all natural materials are suited for aquarium use—resinous wood, like the conifers that are so prominent in the forests around my home, can release potent secondary compounds and natural chemicals that are toxic to aquarium life. Some stones release pH-altering minerals into the water. Anything found on a beach will release salts. In general, we want to choose hardscape material (i.e., stone and wood) that is inert and will not change our water chemistry. I like to soak my wood in a trash can that I have designated for this purpose to leach out tannins and keep the wood waterlogged and ready for use. The stone and wood sold in aquarium shops has proven to be suitable and safe for aquarium use. However, if you have the inclination, some knowledge of botany or geology, and an experimental mindset, there is no reason why you can’t find some natural materials for your aquascaping projects in your own neck of the woods. I have been wanting to try the root structures of local riparian trees, like willow or alder, and collect basalt, lava rock, and slate when out on hikes.
When it comes to choosing hardscape materials for their aesthetic value, you have two choices. You can select materials that have strong visual presence and character of their own—a fine piece of driftwood or stone can look like a natural sculpture, and you might want to highlight such a piece in your aquascape. The horn wood pieces I chose for this article’s demonstration aquascape have such a strong presence that it’s kind of hard not to make the layout interesting! Or you can choose humbler, less interesting rock and wood and test your ability to bring out the best in these simple materials, perhaps covering them in beautiful arrangements of ferns and mosses that obscure the weaker points of the hardscape.
Make sure to take your time figuring out your hardscape arrangement, because it will become the backbone of your aquascape, the prominent aesthetic structure that will define the plantings and the overall visual impact of your creation. The thoughtful and artistic arrangement of charismatic stone, wood, and plants is really what distinguishes a Nature Aquarium from the average planted aquarium.
Here are a couple of hardscape tips: I like to play around with stone and wood layouts in a “sandbox” dedicated to this purpose. I built a 48 x 18-inch (122 x 46-cm) wooden box filled with playground sand and use it to visualize a hardscape layout. It’s a lot of fun and I find it a meditative, relaxing process. Some aquascapers use a sandbox as a sort of daily exercise and ritual to perfect their style. I take lots of photos of a layout that appeals to me, and even mark or label the faces of stones and pieces of wood so I can recreate more complicated layouts in the actual aquarium. Sleep on a hardscape layout before you commit to it, and you might find yourself switching things up a few days later. Time and patience can only improve one’s results.
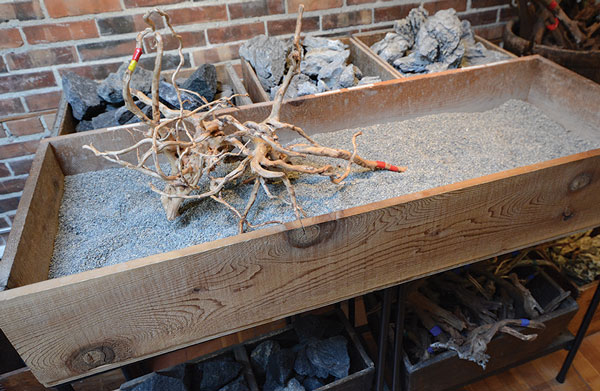
The author’s sandbox: a useful tool for pre-visualizing a hardscape layout before it is applied to an aquascape.
One thing to think about when creating a hardscape is the concept of “creating tension.” I think the most appealing hardscapes are those that look slightly impossible—like they are somehow defying gravity or on the verge of collapse. A flat hardscape is a boring hardscape. You don’t want to overdo it, but bringing some tension into your hardscape arrangement will really give it impact. I use small stones to shim up pieces of wood or stone, raising them up off the substrate to accentuate their strength, beauty, and grace.
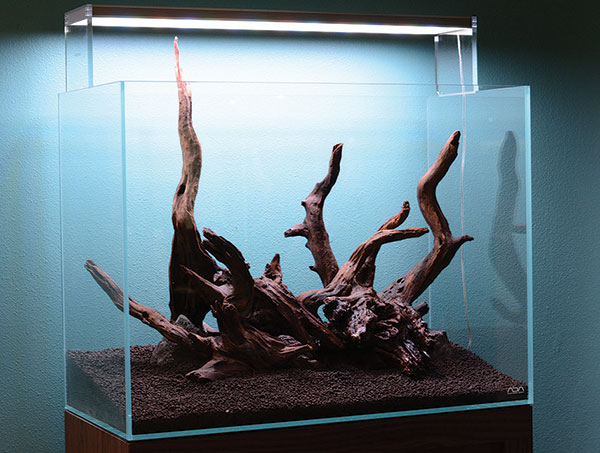
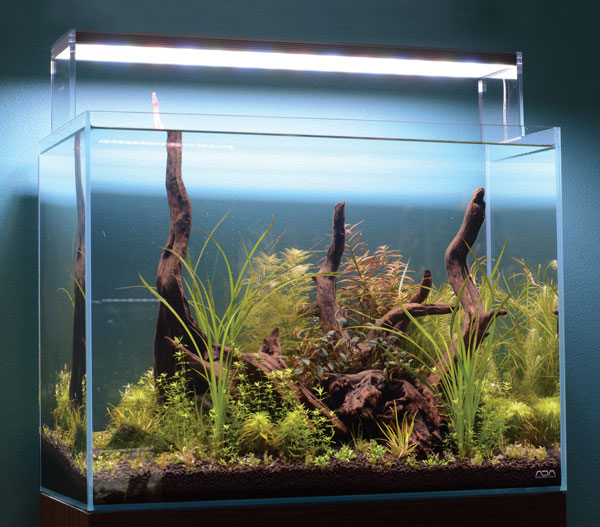
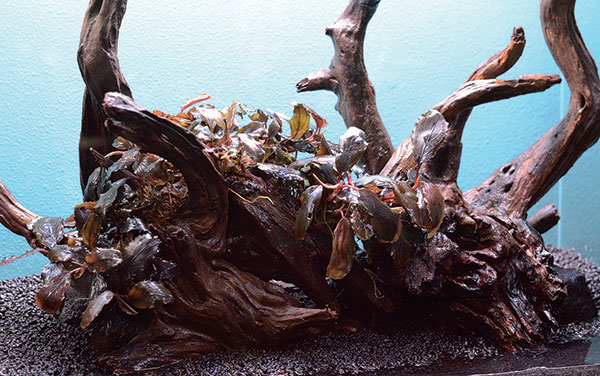
The final version of the wood hardscape is installed over a soil substrate and shimmed into place with stones; the tank is nearly ready for planting.
My aquascaping process
For the layout in this article’s photos, I had a few general ideas in mind prior to beginning the aquascaping process. I had some beautiful, rather dramatic wood pieces that I wanted to use to emphasize the vertical orientation of the aquarium and its unique dimensions; I wanted my plant selection to include a lot of diverse colors, textures, and forms to reflect the blossoming trees and flowers I was seeing during my spring walks in Seattle’s parks and neighborhoods; I wanted to use some classic Nature Aquarium plants that I associate with Takashi Amano’s early layouts from the 1990s; and I wanted the whole thing to look as if the driftwood was being engulfed by lush plants, the dead wood being overtaken by the exuberance of life. As with most things, having focused intentions before starting a project will aid in its success and keep it from going off the rails.
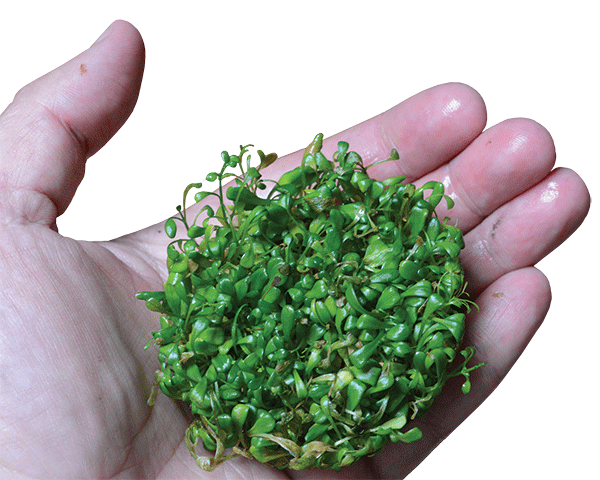
Glossostigma elatinoides has been a signature foreground plant since the 1980s, when it was rare and highly sought-after. Popularized by Takashi Amano, it is now widely available from nursery stock and tissue culture propagation (as seen here).
After spending a few days considering my hardscape arrangement, removing and adding pieces of wood and shimming them in place with stones to bring in a little tension, I set about planting. Aquascapes are often broken down into foreground, middle ground, and background when considering planting schemes. This is an effective and methodical approach to designing a layout. For my foreground carpeting plant, I chose Glossostigma elatinoides, a staple of Nature Aquariums since Amano first started using the plant in the late 1980s.
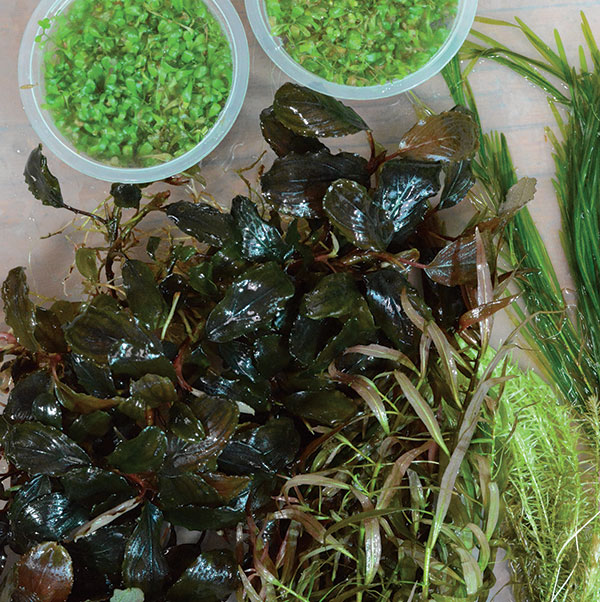
A plastic tray filled with carefully layered, cleaned, and prepared aquarium plants is the aquascaping equivalent of the painter’s palette.
The middle layer would consist of Blyxa japonica, Hemianthus micranthemoides, Bucephalandra spp., and Syngonanthus sp. “Giant,” a plant that is new to me and that I wanted to experiment with. For the background I decided on a screen of Potamogeton gayi, Mayaca fluviatilis, Ludwigia x lacustris, Myriophyllum mattogrossense, Rotala sp. “Green,” and Rotala sp. “H’ra.” These plants were selected for their complementary and contrasting leaf structures and colors. The sedge Cyperus helferi would provide bold vertical brushstrokes of bright green throughout the aquarium and pay homage to Amano’s early Nature Aquariums. The Glossostigma would come from tissue culture, my preferred source of plant material these days—tissue culture plants are algae- and pest-free and will grow uniformly from tiny starts, giving the aquascape a more cohesive look. However, most of the plants in this aquascape were grown out in farm tanks, so they were already adapted to my water conditions and ready to thrive once planted.
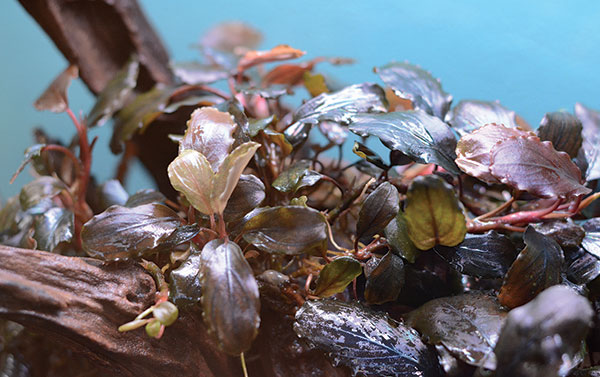
This bunch of Bucephalandra was considered prior to committing it to the aquascape. In the end, it was omitted, as it overwhelmed the sense of scale provided by the other fine and delicate plant selections.
The mechanics of placing the plant material are fairly straightforward. I drain down the aquarium to the point where the water barely covers the substrate. Planting in a loose, wet substrate makes for easy gardening and limits damage to the plant cuttings, and it doesn’t make a mess (as it would if the aquarium were full of water). I tend to start the planting process with the foreground plants. I prepared the tissue culture Glossostigma in advance by removing it from the cup, rinsing gel from the roots of the plant mass, and breaking the nodes up into small chunks. A good pair of planting forceps is essential in making this process as smooth as possible. I like to grab the plant with the forceps, enter the soil level at sort of an oblique angle, pull up on the plant a bit to allow the soil to fill in around the entry point, and then release it. It might take some practice to perfect your own technique.
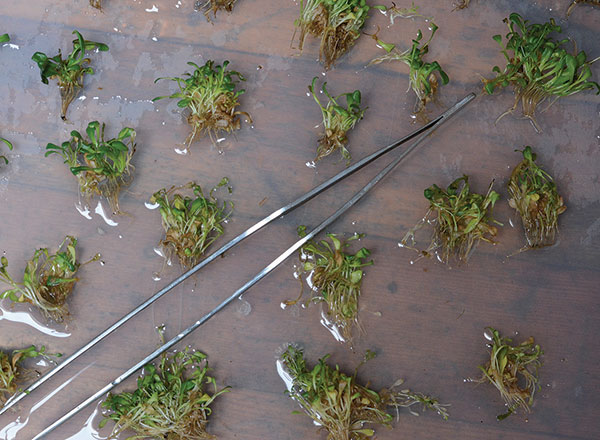
Glossostigma broken up into small pieces in preparation for planting. A good pair of planting forceps makes installation of the propagules much easier and faster.
I spread the foreground starts out in an even distribution pattern. For this layout, I also mounted little bits of Bucephalandra and epiphytic moss, attaching them with the aid of the gel form of cyanoacrylate glue. After the epiphytes were mounted, I finished off the aquascape with the background stem plants and Cyperus. I like to keep a spray bottle filled with water on hand during the planting process, misting the delicate aquatic plants from time to time to keep them hydrated until the aquarium is filled.
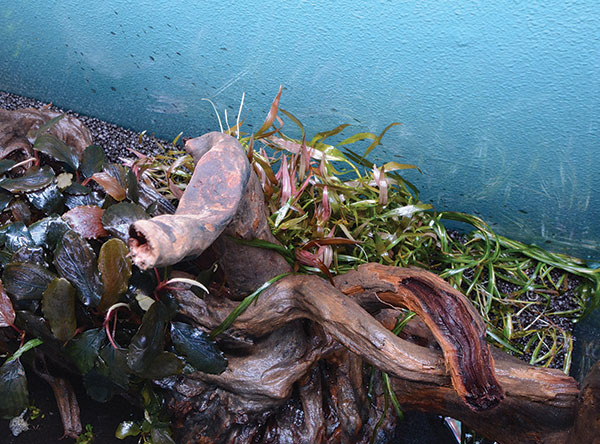
Planting a background screen of stem plants is made easier with a thick substrate layer of wet, loose soil. Do this before the tank is filled.
“Epiphytic” plants like aquatic ferns, Anubias, and mosses can be easily mounted to stone or wood hardscape material with the gel form of cyanoacrylate glue.
Lighting considerations
Once the plants were installed, I gently filled the aquarium with water, using the shower setting on my garden hose nozzle to avoid disturbing the aquascape. I then installed the light.
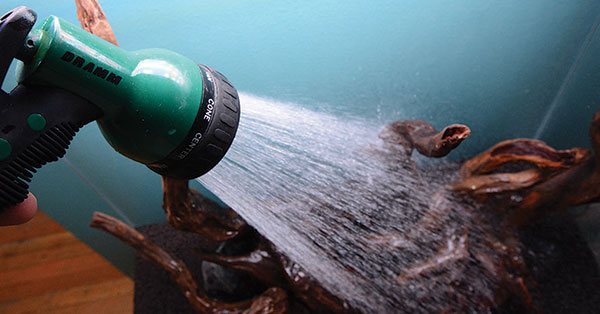
Gently filling the aquarium using the shower setting on a garden hose nozzle disperses the energy of the incoming water, keeping the hardscape from shifting and the substrate line intact.
For this aquarium I chose a Twinstar 600ES, a rather elegant LED unit with a beautiful color rendition. I hoped the Twinstar would pop the colors of the bright Ludwigia and Rotala in the background hedge, and the unit itself just looks very sleek. When choosing lights for a planted aquarium, we want something in the 6000 to 8000 Kelvin range for a color temperature that is pleasing to the eye. Aim for an intensity of at least 50 PAR units at the substrate if your intention is to grow a carpet of foreground plants. If you are serious about aquascaping, a PAR meter is an essential tool that will take the guesswork out of a lot of your planting decisions. In general, we consider 10-20 PAR to be low light, 20-50 PAR to be medium light, and 50 PAR and above to be high light. With the Twinstar 600ES installed on my 18″ tall aquarium, I was getting 75 PAR at the substrate, which I know from past experience should be more than adequate for growing a dense carpet of Glossostigma in the presence of injected CO2. Injected CO2 allows the plants to grow more efficiently, even under moderate light intensity. The light unit was hooked up to a light timer set for an “on” period of eight hours.
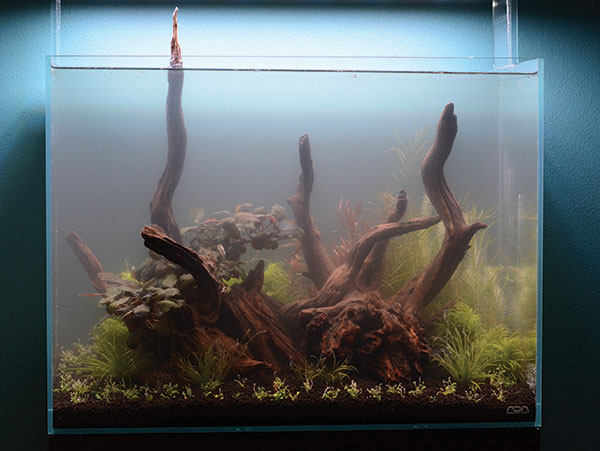
Immediately after planting, the aquarium is gently filled with lukewarm water. A haze from fine substrate particles fills the water column. Canister filtration and daily 50 percent water changes for the first week are essential for regaining water clarity and keeping algae blooms at bay.
In the next episode of “Creating Nature” I will cover carbon dioxide injection, filtration, fertilization, maintenance, trimming plants, cycling the aquarium, and animal selection. Let’s hope the water in my tank clears and the plants in my Nature Aquarium begin to root, grow, and come to life!
Steve Waldron is an AMAZONAS senior contributor and the co-founder of the retail aquascaping shop, Aquarium Zen in Seattle, Washington. He is the editor of the English-language edition of Origin of Creation, the official Takashi Amano biography (Aqua Design Amano, 2016).
Subscribe to AMAZONAS – Never Miss an Issue
Don’t miss Steve Waldron’s writing in AMAZONAS—get your own personal subscription, published in handsome, lifetime-reference print and digital editions—free delivery to your home or office.
ONLINE
ADA Poland—check out Adam Paszczela’s work on Facebook and at
http://www.aquadam.com.pl
Waldron, S. Creating Nature: Part I—Inspiration. AMAZONAS 6 (3): 44–50,
http://www.reef2rainforest.com/2017/04/20/creating-nature-part-1-%E2%80%A2-inspiration